Step-by-Step Home Network Inventory Guide
Article Two – Home Cybersecurity series
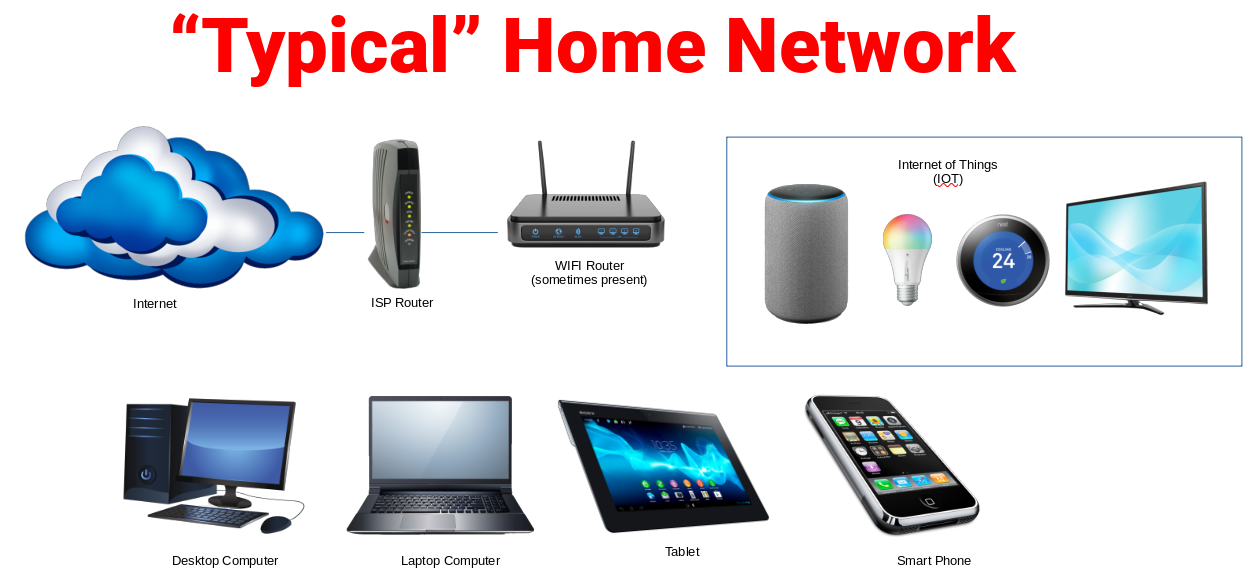
Taking an inventory of your home network is the first step in getting your network under control. There is an old adage that you can’t control what you don’t know about, and the same is true for your network. You have to know what is plugged into it to manage it. This article is a step-by-step home network inventory guide.
Take a look at your network as it stands right now. Take a pen and notebook with you because we are going to start writing things down.
Starting your home network inventory
Start at your router. It is probably the one that your ISP gave you when you signed up for their services. Write down the make, model and any other information that is on the device. Sometimes there is a default password (Hopefully you have changed this by now).
Many times there is a Switch connected to the router because of the limited number of ports available on your ISP’s router. Again, we want the make, model and other information that is printed on the device itself.
If you have a separate WIFI router that is plugged into your ISP’s router, then get the make, model and any other information that is on it.
Walk around your house and repeat the process for anything that is connected. Smart Light bulbs, Smart Thermostats, and the like are what we want. Don’t forget switches and UPS devices.
Delving deeper when we take our home network inventory
When you get to your computers, tablets and phones; we need to go a bit deeper. Yes, we still want the make and model of the computer, but we also want to query the device so we can tell more about it. This will give us a better idea of what we have going forward.
With a PC running Windows:
- Hit Windows+R
- Type “msinfo32“
- Hit “enter”
- This brings you to the “System Summary”
- Open the “File” menu (top bar) and click the “Export” command
- Name the text file you’ll create, choose a location, and then click the “Save” button.
On a Mac:
- On your Mac, choose Apple menu > System Settings, then click General in the sidebar. (You may need to scroll down.)
- Click About on the right.
- Click System Report.
- Choose File > Show More Information.
- Choose File > Save, then enter a name and choose a location for the report.
- Print the report
For an Android Phone or Tablet:
- Open the Settings app on your phone.
- Go to the About phone section.
- Depending on your Android model, the About phone section might include information about the phone’s specs, including CPU, RAM, and display details.
- Write it down
On an Apple I-Phone / iPad:
- Go to Settings > General > About
- This section will give you all of the information about the phone or tablet.
- Write it down
Once we have gathered all of the information we need to put it into a spreadsheet. I have one that you can modify for your purposes, but it is a good starting place to get started.
Scanning the entire home network
Now that we have walked around the house and written everything down, it is time to do an electronic scan of what is on our network. Many homes have both a wired (Ethernet) network and a 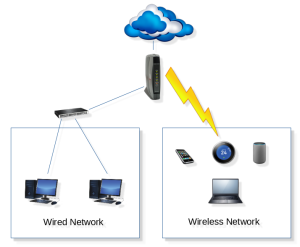 wireless network. We need to scan both to have a complete picture of every device that is on our network.
There are several options for scanning a network. A Mac, PC or even a mobile device can be used to perform the scan and the software options range from easy-to-use (IP Scanner, Fing) to more complex (Nmap, Wireshark).
First, let’s see what our router has to say about the network. If you are using the router that was supplied to you when you signed up for internet service it is most likely that you can get to it by opening your web browser. Most of the ISP’s have either a 192.168.1.x or a 192.168.0.x network. So let’s put in 192.168.1.254 (the next to the last address other than one which isn’t used) into the address bar of our browser and see what we get.
I tried 192.168.1.254 which I know from experience is the network address of my ISP router. Here is what I can see:
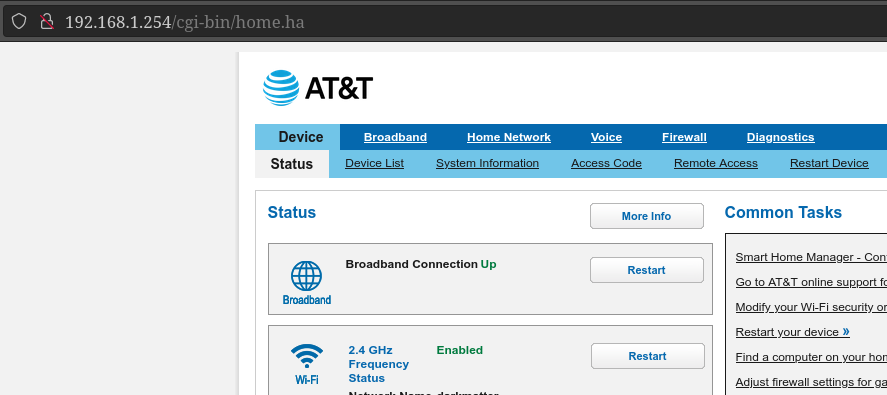
After you put in the address (and sometimes the password) you get the “home page” of the router.
This one is using older software which hasn’t been automatically updated, as my ISP doesn’t care about securing their clients. Not to worry we will be changing things and making our network much more secure soon. The cgi-bin on the address means that it is running older type scripts. Also the .ha on the end of the address is an older form of compression.
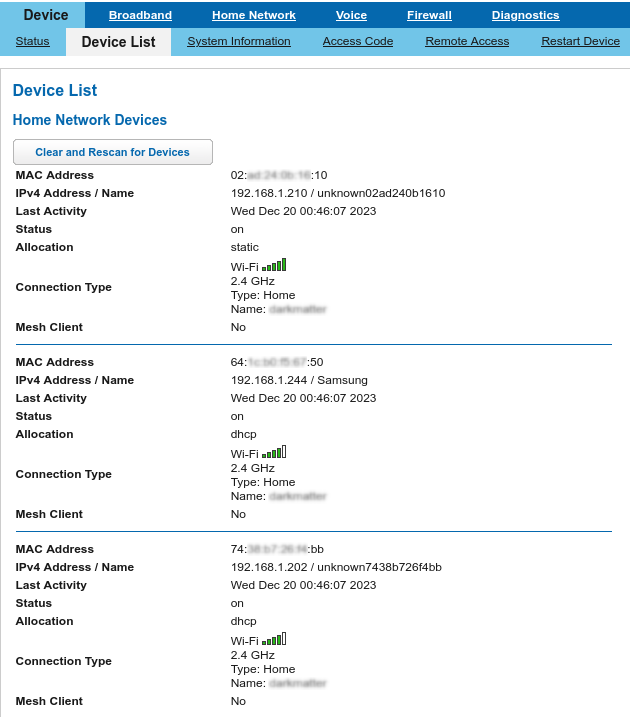
We are going to click on the tab called “device list” to see what we have on the network. This may be named something else on your router, so you may have to look around a bit.
One note about IP addresses
IP addresses change due to DHCP (Dynamic Host Configuration Protocol), This is a network management tool that has a pool of addresses and it hands them out when a device on your network needs one. There are two types of addresses: Dynamic, which changes, and Static, which stays the same. In the next inventory the IP addresses will have changed.
What is the next step?
Now that we know what we have as far as hardware connected to our network – Where do we go from here? Everyone’s network is unique. So we are going to chart out what we have now and plan for the future so that we build our home networks with security and privacy in mind. Fill out the spreadsheet so we have a good inventory list at hand.
In the next article we will talk about the home network diagram – charting what we have right now and putting in a few devices and some network rules so we are safe, secure and reduce our attack surface.
The devices that we will be looking at are:
- A good hardware firewall – stopping the bad guys before they even enter our home.
- a smart switch – to create lanes of traffic to specific types of devices and better manage them.
Take a look at the first article, it gives an overview of where we are headed with the whole series. Don’t forget to sign up for our newsletter (it is monthly and special editions when new content is available).
Very ,very nice cource as base of the home network
Thank you – we will be getting more in depth as the series progresses.
Pix