How to create Windows 10/11 boot repair disk
It is wise to create a Windows 10/11 boot repair disk before you have problems. All hard drives fail, things get corrupted or you have other problems and without a Windows 10/11 boot repair disk you are left without a working computer. Here are the steps to follow to make a boot repair disk.
Step 1
Connect a USB Thumb Drive with at least 16Gb of storage capacity to your computer so that it recognizes it. Note: everything on that drive will be erased, so use a new one.
Step 2
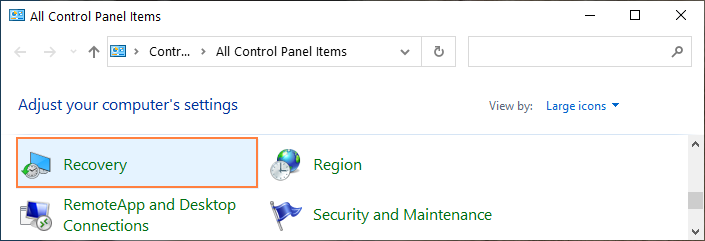
Go to your control panel and choose “Recovery”.
Step 3

Click on “Create a recovery drive”.
Step 4
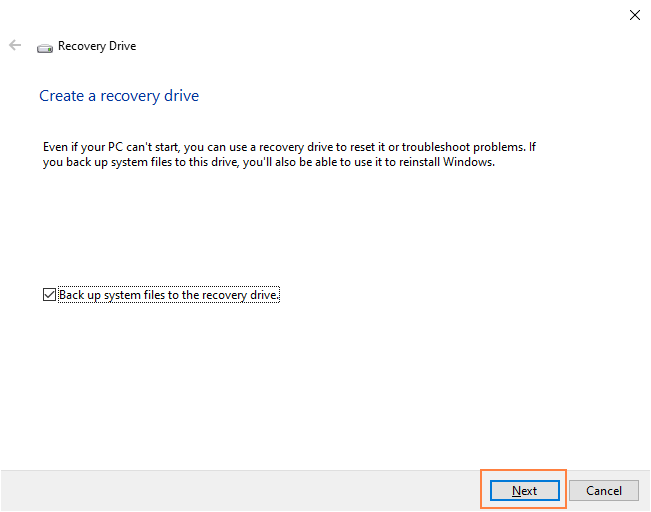
Check the box “Back up system files to the recovery drive” and click “Next”.
Step 5
Select the USB flash drive and click “Next”.
Click “Create” to start the process of making the Windows boot repair disk. It will take some time but in awhile you will have a repair disk for your computer.
How to Use it
Plug it into the computer and reboot. Set your BIOS to boot to the USB. Then, when the recovery screen appears, go to “Advanced options” > “Troubleshoot” > “Startup Repair”.
If that does not solve the problems you should go to the command prompt and type in
hit “enter” to execute the command.