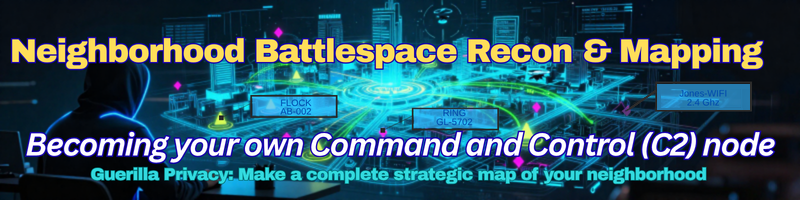
Changing the Battlespace
True autonomy requires a different mindset. It requires you to stop running and start commanding. By incorporating Neighborhood Battlespace Recon & Mapping we control the grid and know where the holes are.
In military doctrine, a commander does not simply react to the terrain; they assess the Total Picture. They look at the ground, the signals, the capabilities, and the resources. They synthesize this data into a Common Operating Picture and, in doing so, become their own Command and Control (C2) node. They do not wait for orders from a central authority; they generate their own intelligence and issue their own directives.
This is the shift we are making today. We are moving from the “Quick Escape” to Battlespace Awareness. We are no longer just mapping the cameras on our street; we are mapping the Theater.
Your neighborhood is not just a place where you live. It is a complex ecosystem of sensors, infrastructure, and human networks. The fire station down the road is not just a building; it is a potential command post with backup power and medical supplies. The grocery store is not just a shop; it is a resupply node with blind spots in its security grid. The library is not just a quiet place; it is a digital dead zone where your signal dies and the cameras lose you.
By mapping this entire theater, you change the Battlespace. You turn the environment from a hostile grid of surveillance into a landscape of opportunity. You identify the Safe Corridors where the sensors are weak. You locate the Resupply Points where you can restock without being logged. You find the Human Alliances where neighbors can provide cover or information.
This is not paranoia. This is situational dominance. When you know the terrain better than the system that watches it, you cease to be a target. You become the commander of your own domain. You stop asking, “Where can I hide?” and start asking, “How do I control this space?”
In the sections that follow, we will build your Threat Map. We will deploy SIGINT to listen to the invisible radio waves. We will mine OSINT to uncover the public data hiding in plain sight. We will engage HUMINT to turn your neighbors into a distributed intelligence network. And we will overlay it all onto a single map that reveals not just where the watchers are, but where the power lies.
The grid is vast. But it is not omnipotent. It relies on your ignorance of the terrain. Once you know the ground, the grid belongs to you.
The Battlespace: A Commander’s View
In military doctrine, a commander does not simply react to the terrain; they assess the Total Picture. They look at the ground, the signals, the capabilities, and the resources. They synthesize this data into a Common Operating Picture (COP) and, in doing so, become their own Command and Control (C2) node. They do not wait for orders from a central authority; they generate their own intelligence and issue their own directives.
To navigate the modern surveillance state, you must adopt this same mindset. Your neighborhood is not just a place where you live; it is a Theater of Operations. The cameras on your porch are just the tip of the spear. The real threat lies in the network that connects them: the traffic cameras at the intersection three blocks away, the ALPR readers at the highway on-ramp, the Wi-Fi mesh of the coffee shop you pass every day, and the municipal servers that aggregate it all.
To map this theater, you must understand the Nine Layers of Intelligence that compose the Battlespace. While a full assessment would require mastery of all nine, we will focus on the three that provide the highest return on investment for the civilian strategist: SIGINT, OSINT, and GEOINT.
The Full Intelligence Stack
- SIGINT (Signal Intelligence): The invisible layer. The RF emissions — Wi-Fi, Bluetooth, cellular, and proprietary sensor signals. This tells you where the digital eyes are looking and where the “dead air” zones are.
- OSINT (Open Source Intelligence): The public record. Municipal contracts, camera registries, and community data. This fills in the gaps you cannot see physically.
- GEOINT (Geospatial Intelligence): The terrain itself. Elevation, sight lines, and physical barriers. This calculates exactly what a camera can see based on the landscape.
- HUMINT (Human Intelligence): The conversations with neighbors and local stakeholders. This provides the “ground truth” — the intent behind the cameras and the reliability of the infrastructure.
- IMINT (Imagery Intelligence): Satellite and aerial views. Used to analyze building layouts and camera mounting points from above.
- MASINT (Measurement and Signature Intelligence): Non-visual sensors like acoustic gunshot detectors or seismic monitors.
- Infrastructure Intelligence: Power grids, fiber routes, and cell towers that determine the resilience of the network.
- Temporal Intelligence: The time dimension. When are cameras monitored live? When do data batches upload?
- Legal Intelligence: The governance layer. Local ordinances, data retention policies, and surveillance oversight laws.
The Core Focus: Building Your Baseline Map
For the purpose of this guide, we will concentrate on the Triad of Awareness: SIGINT, OSINT, and GEOINT.
These three layers form the foundation of your Threat Map. They are the most accessible, the most actionable, and the most critical for identifying the “Safe Corridors” and “Hot Zones” in your neighborhood.
- SIGINT gives you the raw data of the digital grid.
- OSINT gives you the context of the public infrastructure.
- GEOINT gives you the physical reality of the terrain.
Together, they allow you to answer the three most important questions:
- Where are the sensors? (SIGINT & OSINT)
- What can they see? (GEOINT)
- Where are the blind spots? (The synthesis of all three)
The following sections will walk you through the methodology of collecting this data, from the “War-Walking” pipeline using Kali Linux and the ALFA AWUS036AXM, to mining public records, to overlaying it all onto a single map. By the end, you will not just be walking through your neighborhood; you will be commanding it.
The WarWalking Toolkit: Essential vs. Advanced
To build your Threat Map, you do not need a military-grade budget. You need the right tools for the job. We divide the equipment into two tiers: the Essential Kit, which covers 90% of residential surveillance detection, and the Advanced Toolkit, which unlocks the hidden layers of the spectrum (MASINT and deep SIGINT).
Tier 1: The Essential Kit (The Foundation)
This is the minimum viable setup to conduct a professional-grade SIGINT and OSINT sweep.
- Laptop: Any machine capable of running Kali Linux (native or in a VM). A Linux environment is non-negotiable for the driver support and tools required.
- Wi-Fi Adapter: The ALFA AWUS036AXM (or similar high-gain, Wi-Fi 6 capable adapter).
- Why: Built-in laptop cards are weak and often lack “Monitor Mode.” The ALFA adapter provides the range to detect signals from 200+ meters away and the sensitivity to pick up weak beacons from distant smart cameras. Its Wi-Fi 6 support ensures you don’t miss the newest generation of surveillance devices.
- GPS Receiver: A USB GPS dongle or a smartphone with a serial-to-USB adapter running a GPS daemon (like
gpsd).- Why: Kismet needs real-time coordinates to tag every detected signal. Without GPS, you have a list of networks, but no map.
- Software Stack:
- Kismet: The core sensor for detecting Wi-Fi, Bluetooth, and other RF protocols.
- Kismetdb Tools: For exporting data to CSV/JSON for analysis.
- Python/Folium: For generating the interactive map.
- OUI Lookup Script: For identifying manufacturers from MAC addresses.
With this kit, you can map the Visible Grid: Wi-Fi cameras, Bluetooth beacons, and standard smart home hubs. This is sufficient for most residential and urban environments.
Tier 2: The Advanced Toolkit (The Deep Dive)
If you want to detect the “Silent” sensors — those that don’t broadcast Wi-Fi but use other frequencies — you need to expand into the Software Defined Radio (SDR) domain. This is optional but highly recommended for a complete Battlespace Assessment.
- Software Defined Radio (SDR):
- RTL-SDR (V5): The entry-level choice. Cheap (about $45), USB-powered, and capable of scanning a wide range of frequencies (100kHz-1.75GHz).
- Use Case: Detecting 433 MHz/915 MHz garage door openers, older wireless doorbells, and some low-power IoT sensors.
- HackRF One or LimeSDR: The professional choice. Full-duplex, wider frequency range (1 MHz – 6 GHz), and transmit capability.
- Use Case: Detecting proprietary ALPR links, analyzing cellular handshakes, and potentially identifying the specific modulation of Flock or ShotSpotter sensors.
- RTL-SDR (V5): The entry-level choice. Cheap (about $45), USB-powered, and capable of scanning a wide range of frequencies (100kHz-1.75GHz).
- Specialized Software:
rtl_power/gr-scan: For sweeping the spectrum and creating heatmaps of RF activity.dump1090: Specifically for decoding ADS-B signals from aircraft (useful if your “Theater” includes flight paths or drone surveillance).UHD/GNURadio: For custom signal processing and decoding unknown protocols.
- Directional Antennas:
- Yagi or Log-Periodic Antennas: These focus your reception in a specific direction, allowing you to triangulate the exact location of a hidden transmitter (like a wireless bridge for a hardwired camera) rather than just knowing it exists somewhere in the neighborhood.
The Trade-Off
The Essential Kit is passive, legal, and easy to deploy. You can walk down the street with a laptop in a backpack and a phone in your pocket, and no one will know you are mapping the grid.
The Advanced Toolkit (SDR) is more powerful but carries higher operational risks.
- Complexity: SDRs require more technical knowledge to configure and interpret.
- Visibility: Carrying a large directional antenna or a HackRF can draw attention.
- Legal Gray Areas: While listening is generally legal, transmitting (which some SDRs can do) is heavily regulated. Never transmit on frequencies you do not own. Stick to passive reception.
Recommendation: Start with the Essential Kit. Master the Wi-Fi and Bluetooth layer. Once you have mapped the “Visible Grid,” you will naturally encounter gaps — sensors you know are there (from OSINT or visual inspection) but cannot detect with Wi-Fi. That is the moment to invest in an SDR. The SDR is not a replacement for the Wi-Fi adapter; it is the key to unlocking the hidden layers of the battlespace.
The War-Walk: A Step-by-Step Workflow
The goal of the War-Walk is to transform a physical journey through your neighborhood into a structured dataset. You are not just walking; you are conducting a passive sensor sweep. Follow this workflow to ensure your data is clean, geotagged, and ready for mapping.
Phase 1: Pre-Flight Configuration
Before you leave the house, your gear must be synchronized.
- Boot the Environment: Launch your laptop into Kali Linux. Ensure your network manager is disabled or set to “Airplane Mode” to prevent your laptop’s internal Wi-Fi from interfering with the scan.
- Attach the Adapter: Plug in your ALFA AWUS036AXM. Verify that the system recognizes it and that it is in Monitor Mode. (You can check this with a simple status command, but the tool will handle the heavy lifting).
- Connect the GPS: Plug in your USB GPS dongle or pair your phone via USB tethering. Ensure the
gpsdservice is running and broadcasting your coordinates to the system. - Launch Kismet: Start the Kismet server. Configure it to listen on your external adapter and to ingest GPS data. Set the output format to SQLite (
.kismetdatabase) for easy later processing.
Phase 2: The Sweep
Now you move.
- The Route: Walk or drive your predetermined route. Cover your entire Area of Operations (AO) — your street, the adjacent blocks, and the commercial zones you frequent.
- Pacing: Move at a steady, natural pace. Do not rush. If you are driving, keep windows closed to reduce wind noise (though this matters less for digital signals). If walking, keep the laptop in your backpack with the antenna exposed (many backpacks have a dedicated antenna port or a mesh window).
- Passive Listening: Let Kismet do the work. It will automatically detect every Wi-Fi beacon, Bluetooth probe, and SSID broadcast within range. It will tag each detection with your current GPS coordinates and signal strength (RSSI).
- Note-Taking (Optional): If you spot a physical camera that you suspect is “silent” (no Wi-Fi signal), make a mental note or a quick voice memo of the location. You will cross-reference this later with OSINT.
Phase 3: Data Extraction
Once the sweep is complete, you have a raw database file. Now you need to make it readable.
- Export to CSV: Use the Kismet database tools to export your data into a CSV (Comma Separated Values) file. This file will contain columns for:
Timestamp,Latitude,Longitude,SSID,MAC,
AddressSignal Strength, andChannel. - Run the OUI Lookup: Feed the CSV into your OUI Lookup Script (included in the resource pack). This script reads the first six characters of every MAC address and appends a new column:
Vendor.- Result: You now know if a signal belongs to “Amazon Technologies” (Ring), “Google LLC” (Nest), or “Flock Safety.”
- Filter the Noise: Run a filter to remove known “noise” (e.g., your own home network, public libraries you aren’t interested in). Keep only the “Unknown” or “Surveillance” vendors.
Phase 4: The Map Generation
Now you visualize the data.
- Load into Folium: Use the Map Generator Script (included in the resource pack). Point it to your cleaned CSV file.
- Define the Layers: The script will automatically plot:
- Red Markers: High-confidence surveillance nodes (Ring, Flock, etc.).
- Yellow Markers: Unknown vendors or generic routers.
- Blue Line: Your walking/driving path.
- Generate the HTML: The script produces a single interactive HTML file. Open this in your browser. You can zoom in, click on markers to see the vendor name and signal strength, and trace your path.
Phase 5: The Synthesis
You now have a SIGINT Map. But it is incomplete.
- Overlay OSINT: Open your OSINT findings (the list of municipal cameras, Ring Partner locations, etc.) in a separate layer on the same map.
- Identify the Gaps: Look for intersections where the SIGINT map is empty, but the OSINT map shows a camera. These are your “Silent Nodes” (likely hardwired cameras). Mark them as high-risk.
- Identify the Blind Spots: Look for areas where both SIGINT and OSINT are silent. These are your Safe Corridors.
OSINT Integration: Mining the Public Record
Your War-Walk gave you the digital footprint — the signals your radio can hear. But the surveillance state is not just wireless. Many cameras are hardwired, many sensors are proprietary, and many contracts are buried in public records that never broadcast a signal. This is where OSINT becomes your second pair of eyes.
OSINT is not hacking. It is not leaking. It is reading what is already out there, if you know where to look. The goal is to find the sensors your radio sweep missed and to validate the ones you found.
What OSINT Can Tell You
OSINT reveals the hidden layers of the grid that your radio cannot detect. It tells you the exact addresses or intersections where cameras are installed, even if they are hardwired and silent. It uncovers contract details, showing you which companies like Flock, Axon, or Ring are being used and where. It reveals monitoring habits, letting you know if cameras are watched live or reviewed only after an incident. It exposes data retention policies, showing how long footage is kept before deletion. It identifies law enforcement access, confirming whether footage is shared with police or other agencies. It tracks installation dates, helping you see how surveillance is expanding over time. Finally, it can hint at maintenance status, indicating if a camera is active, offline, or decommissioned.
The OSINT Sources
Start with municipal and law enforcement records. Most cities publish their surveillance infrastructure in some form. Search your city’s website for city council minutes using keywords like “camera,” “ALPR,” “Flock,” “surveillance,” or “smart city.” Budget approvals often list exact camera counts and locations. Look for procurement contracts, as many cities use Flock Safety, Axon, or Vigilant Solutions. These contracts are public records. Search your state’s public records portal or file a FOIA request to find them. Check police annual reports, as some departments advertise their camera counts and coverage zones in community reports or press releases.
Check the Flock Safety transparency page. Flock maintains a public-facing page listing which law enforcement agencies use their system. Cross-reference this with your local police department to confirm whether your neighborhood falls within an active Flock zone. If your city uses Flock, assume every major arterial road is covered.
Explore the Ring “Neighbors” app. The Ring app is a goldmine. Users post camera footage publicly, often with location tags. Browse your neighborhood’s feed to identify which houses have active Ring cameras and where they are pointed. More importantly, Ring publishes a “Partners” list showing which law enforcement agencies have requested footage. If your local PD is on that list, every Ring camera in your Area of Operations is effectively a police sensor.
Investigate camera registry programs. Many cities run voluntary “Camera Registration” programs where businesses and residents register their security cameras with the police. These registries are often published or available through FOIA. If a house on your street registered their camera, mark it as a high-confidence threat node.
Review building permits and property records. Large retailers, banks, and gas stations typically file security plans with local authorities. Your county’s property appraiser or building department may have records of commercial camera installations.
Scan community forums and social media. Nextdoor, local Facebook groups, and Reddit communities often discuss camera placements, suspicious activity alerts, and neighborhood watch programs. A neighbor posting “I just installed a Ring camera covering the sidewalk” is giving you free HUMINT disguised as social media.
Use Google Maps and Street View. Use historical Street View imagery to spot camera mounts that may have been added since your last visit. Zoom in on building corners, light poles, and storefronts to identify physical hardware.
The OSINT Workflow
Begin by defining your search terms. Create a list of keywords specific to your area, such as “[City Name] + camera + contract,” “[City Name] + Flock + ALPR,” “[County Name] + surveillance + ordinance,” or “[Police Department] + camera + registry.”
Next, search public records portals. Most cities have an online portal for public records. Use your search terms to find meeting minutes, procurement documents, budget allocations, and police reports.
Then, cross-reference with your SIGINT data. Take the camera locations you found in OSINT and compare them to your War-Walk data. If SIGINT detected a “Ring” SSID at the same address OSINT listed, you have a high-confidence node. If OSINT lists a camera but SIGINT detected nothing, this is a “Silent Node” — likely hardwired with no wireless signature. Mark it as high-risk. If SIGINT detected a signal but OSINT has no record, this is a “Private Node”—a camera not registered with authorities. Investigate further.
Build your OSINT layer. Create a second CSV file with your OSINT findings, including the address, camera type (Ring, Flock, Municipal, etc.), the source of the information (Council Minutes, Contract, Neighbor Report, etc.), and a confidence level (High, Medium, Low).
Finally, merge with your SIGINT map. Use the Map Generator Script from the Resource Pack to overlay both datasets on the same map. High-confidence surveillance nodes, where SIGINT and OSINT match, will appear as red markers. OSINT-only nodes, representing silent hardwired cameras, will appear as orange markers. SIGINT-only nodes, representing private unregistered cameras, will appear as yellow markers. Your War-Walk path will be traced in blue.
The Output
After the OSINT layer, your Threat Map now has two data streams converging on a single surface: the RF emissions from SIGINT and the public records from OSINT. Where both agree, you have a high-confidence threat node. Where they disagree, you have a gap worth investigating. Where both are silent, you may have found a blind spot.
HUMINT: The Human Layer
Your SIGINT sweep mapped the invisible grid. Your OSINT research filled in the public record. But neither tells you the most critical variable in the equation: intent. A Ring camera on a porch is just hardware. Who controls it, where it points, whether the footage flows to law enforcement, and how the owner reacts to strangers — that is human intelligence. And you can only get it by talking to people.
This is where the privacy advocate becomes a community leader. The same war-walking route that maps the RF emissions now becomes a diplomatic circuit. You are not spying on your neighbors; you are engaging them. The goal is twofold: to gather ground truth about the sensors in your Area of Operations, and to plant the seed of awareness that may eventually neutralize the threat from within.
The Conversation Framework
Approach each interaction as a neighbor, not a researcher. Lead with curiosity, not accusation. People are far more likely to share information when they feel respected rather than interrogated.
Start with an opener that disarms suspicion. “Hey, I noticed you’ve got a camera up there. How do you like it? I’ve been thinking about getting one myself.” This treats the camera as a consumer product, not a surveillance tool, and invites them to talk about their experience.
Pivot gently to the details. “Does it cover the whole yard, or just the doorstep?” This is your intelligence question, disguised as casual curiosity. Their answer tells you the field of view without you needing to guess.
Introduce the awareness moment carefully. “Did you know that Ring shares footage with police departments through their Partner Program? I wasn’t sure about that when I was looking into them.” This plants the seed. You are not telling them what to do; you are sharing information they may not have. Many Ring owners genuinely do not know their camera feeds a law enforcement database.
Exit on a friendly note. “Thanks, that’s good to know. Stay safe out there.” You want them to remember you as a pleasant neighbor, not the person who grilled them about their security system.
What You Learn
From a single conversation, you can extract critical intelligence for your Threat Map. You learn the field of view: does the camera cover just the porch, or does it sweep the sidewalk and street? You learn monitoring habits: do they check the feed live, or only review it when triggered? You learn retention: do they keep recordings, and if so, for how long? You learn law enforcement access: have they ever shared footage with police, or been asked to? And you learn connectivity: is the camera connected to a cloud service like Ring or Nest, or is it locally stored on an SD card? Cloud-connected cameras are far more likely to be accessible to third parties.
The Bigger Play: Community Awareness
Each conversation is also an opportunity to educate. Most people install cameras for legitimate safety concerns. They are not adversaries; they are uninformed participants in the surveillance state. When you explain — gently, without judgment — that their Ring doorbell may be feeding a police database, you give them the agency to make an informed choice. Some will change their settings. Some will opt out of the Partner Program. Some will simply be more thoughtful about where they point the next camera. A few may even join your mapping effort.
This is how you turn the hostile crowd into a distributed intelligence network of your own. One conversation at a time, you build both your Threat Map and your community’s resilience.
OPSEC for HUMINT
Be mindful that you are revealing your own interest in surveillance when you ask these questions. A neighbor who works in law enforcement, or one who is deeply invested in their camera system, may flag you as someone who is “anti-security” or “suspicious.” Pace your conversations. Do not canvas the entire block in one weekend. Spread your visits across weeks or months. Blend your HUMINT collection into normal social interactions — a chat at the mailbox, a wave across the fence, a comment at a community meeting.
The goal is to be remembered as “that friendly neighbor who mentioned something about Ring and the police,” not “that person who was asking a lot of weird questions about my camera.”
The Long Game
Counter-surveillance through HUMINT takes time. It is not a quick fix like a Faraday bag or a phone swap. It is a slow, deliberate process of building trust and awareness. But the payoff is immense. A neighbor who understands the risks of their camera system is a potential ally. A community that knows where the blind spots are can move together safely. And a neighborhood that trusts you is a neighborhood that will protect you.
In the end, the most powerful tool in your arsenal is not the ALFA adapter or the SDR. It is the ability to look a stranger in the eye, shake their hand, and say, “Let’s make sure we’re all safe.” That is the true definition of battlespace awareness.
Conclusion: The Map Is Alive
You now have the foundation of a true Battlespace Assessment. Through SIGINT, you mapped the invisible grid — the Wi-Fi beacons, the Bluetooth probes, the RF signatures that reveal where the digital eyes are watching. Through OSINT, you uncovered the public record — the contracts, the registries, the municipal data that exposes the silent nodes your radio could not hear. Through HUMINT, you engaged the human layer — the conversations that revealed intent, monitoring habits, and the possibility of turning neighbors from passive participants into informed allies.
This is not the end of your intelligence work. It is the beginning. The nine-layer framework we outlined — SIGINT, OSINT, HUMINT, GEOINT, IMINT, MASINT, Infrastructure, Temporal, and Legal — represents the full spectrum of battlespace awareness. You have mastered the three most accessible and impactful layers. The remaining six are there for when you are ready to deepen your analysis. Each layer adds another dimension to your Common Operating Picture, transforming a flat map into a living, breathing representation of your environment.
Your Threat Map is not a static document. It is a living intelligence product that evolves with every walk, every conversation, every new contract filed with the city. Update it weekly. Add new nodes as they appear. Remove decommissioned cameras. Recalculate your Safe Corridors as the grid expands. The map is only as good as its freshness. Treat it like a military operations board — always current, always actionable.
Customizing Your Map
One of the strengths of the Resource Pack is flexibility. The Map Generator Script is designed to support custom visualizations. You can assign different icons and colors to different camera types. Flock cameras can appear as one symbol, Ring cameras as another, municipal nodes as a third. You can color-code by confidence level — red for high-confidence matches between SIGINT and OSINT, orange for OSINT-only silent nodes, yellow for SIGINT-only private nodes. You can even add popups that display the vendor name, signal strength, and source of information when you click on a marker. The map is yours to configure. Make it intuitive. Make it readable. Make it yours.
The Bigger Picture
This series began with the tactical necessity of the Quick Escape — how to break the track, how to vanish from the algorithm, how to move through the hostile crowd without leaving a permanent record. It ended with the strategic necessity of Battlespace Awareness — how to map the theater, how to command your own domain, how to turn the environment from a hostile grid into a landscape of opportunity.
Evasion is reactive. Awareness is proactive. Together, they form a complete defense. You cannot hide forever, but you can know where you are safe. You cannot shut down the surveillance state, but you can navigate it with your eyes open. You cannot stop the watchers, but you can make yourself expensive to track.
The grid is vast. But it is not omnipotent. It relies on your ignorance of the terrain. Once you know the ground, the grid belongs to you.
The Resource Pack
All scripts and configuration files referenced in this article are available in a single Resource Pack (download link below). This pack includes the OUI Lookup Script, the Map Generator with customizable icons and colors, the OSINT Search Template, the Configuration Guide for Kismet and gpsd on Kali Linux, and Sample Data to test the workflow. No coding experience is required. Simply unzip the pack, follow the instructions, and let the tools do the heavy lifting.
Download the Scripts (Zip file)

Disclaimer:
This article is for individuals at higher risk or in places that have repressive governments. It is intended to augment freedoms that we all hold dear. I do not advocate anything illegal or immoral be done with this knowledge. Be safe out there. Find More Guerilla Privacy Articles.