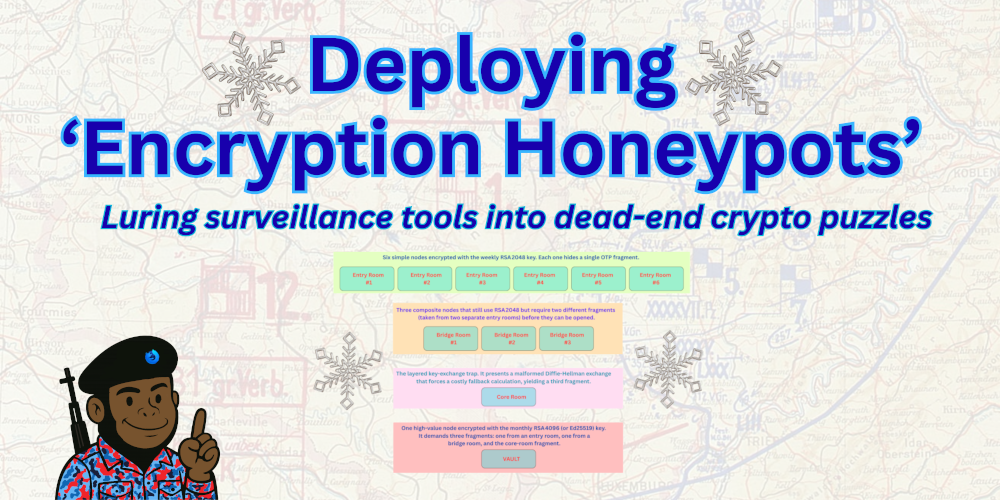
Luring surveillance tools into dead-end crypto puzzles
In this article I’ll walk you through a modest but powerful honeypot you can host on any domain — preferably behind a VPN so your IP stays hidden. The goal is simple: publish files that look like ordinary data dumps, but that actually lure surveillance tools into costly, dead-end puzzles. By making the cipher itself the prize, we turn the attacker’s curiosity into wasted CPU cycles and valuable intel about who’s watching.
Over the next few sections we’ll build a three-layer system:
(1) encrypted conversation bundles that promise a tiny OTP slice,
(2) self-destructing archives that create a sense of urgency
(3) a snowflake-shaped puzzle network where some locks need multiple keys from different branches.
I’ll show you exactly which commands to run on Pop! OS, how to organize the web folder, and why each piece forces an adversary to spend time—and money—on a problem that leads nowhere. If you can set up a domain and a VPN, you already have everything you need to replicate this “cipher-as-prize” strategy. Let’s dive in and see how you can turn a simple web directory into a smart, low-cost trap for anyone trying to pry into your communications.
Here’s the high-level roadmap for building the “Encryption Honeypots” playground on your Linux workstation. I’ll list the major milestones in the order you’ll tackle them, then we’ll dive into each one in detail in the next sections.
1. Set up a domain and a VPN tunnel – Register a short domain (or use a sub-domain you already own) and route all traffic through a VPN so the server’s IP stays hidden from casual scans.
2. Install and configure the web server – Get nginx (or Apache) running, create a dedicated honeypot/ directory under the document root, and enable HTTPS with a free Let’s Encrypt certificate.
3. Generate the cryptographic assets – Create the RSA 2048 key for the “easy” month, the RSA 4096/Ed25519 key for the next month, and a set of random OTP fragments that will seed the puzzles.
4. Build the encrypted-conversation bundles – Assemble short markdown “chat logs,” pack them with a tiny OTP slice, tar them, and encrypt the archive with the RSA 2048 public key.
5. Create the self-destructing OTP bundles – Add an expiration note to each archive, set up a cron job that swaps the files out at the deadline and returns a 410 Gone response for the old ones.
6. Design the snowflake-style puzzle network – Lay out a small graph of “rooms”: simple locks, composite locks, the layered key-exchange trap (Room 3A), and the high-value triple-key vault. Generate the necessary fragments and encrypt each room with the appropriate key size.
7. Publish the public-key directory – Export your public key, host it in the keys/ folder, and optionally pull activist keys from keys.openpgp.org to create a browsable collection.
8. Add country-based IP gating – Install the GeoIP module for nginx, define which countries may access the high-value vaults, and return a 403 for everyone else.
9. Write the supporting documentation – Draft a short README in the honeypot/ folder that explains the theme, the expiration dates, and a friendly note encouraging curious analysts to explore (without giving away any secrets).
10. Test the whole flow – Use a separate device or a VM to fetch the files, attempt decryption, and verify that the expiration and IP-blocking behave as expected.
Step One and Two
Ubuntu / Debian – Install a web server, get a Let’s Encrypt certificate, and start the service:
sudo apt install nginx certbot python3-certbot-nginx
sudo certbot –nginx -d yourdomain.com -d www.yourdomain.com sudo systemctl enable –now nginx
If you prefer Apache, swap nginx for apache2 in the install line and run “sudo certbot –apache” instead.
Creating the honeypot folder and setting permissions – The path to the web root varies, but the commands are the same once you know it:
- On Ubuntu/Debian the root is
/var/www/html. - On Red Hat the root is usually
/var/www.
Create the directory and give the web user read access:
Ubuntu/Debian
sudo mkdir -p /var/www/html/honeypot
sudo chown -R www-data:www-data /var/www/html/honeypot
sudo chmod 755 /var/www/html/honeypot
Reloading the web server after you add a location block – Once you edit the config file, simply run:
sudosystemctl reload nginx
That’s the essential set of commands for both families. With these in place you can upload your encrypted bundles to the honeypot folder and start the puzzle.
Step Three – Generate the cryptographic assets
First, on your Linux workstation create two GPG key pairs. The “weekly” key uses a 2048-bit RSA modulus; it’s intentionally modest so the initial “daily” bundles feel approachable. The “monthly” key is a 4096-bit RSA (or an Ed25519 key if you prefer) and will protect the higher-value vaults that appear at the start of each new month.
Give each key a clear, descriptive user ID — something like “Weekly 2026 weekly@yourdomain.com” and “Monthly 2026 monthly@yourdomain.com”. When you generate them, set a strong passphrase for the monthly key (a long, random phrase) and a slightly simpler one for the weekly key; the difference in difficulty will be evident to anyone who tries to crack the outer PGP layer.
Export the public portions of both keys to ASCII-armored files (weekly_pub.asc and monthly_pub.asc). Those files will be uploaded to the server and referenced in the README so anyone who discovers the honeypot can see which key protects each bundle. Keep the private keys offline—store them on an encrypted USB stick that you only plug into your workstation when you need to sign or encrypt new archives.
Finally, generate a pool of random OTP fragments (16- to 32-byte binaries) that will seed the puzzle rooms. You can create them with dd if=/dev/urandom bs=32 count=1 of=frag_01.bin and repeat for as many fragments as you need. Once the keys and fragments are ready, you’ll upload the public keys and the ready-to-use fragment files to the honeypot/ directory over your VPN connection. The actual encryption scripts will be bundled later, but at this stage you’ve laid the cryptographic foundation for both the “semi-easy” weekly challenges and the tougher monthly vaults.
Step Four – Build the encrypted-conversation bundles
1. Write the “tidbits”
Create a plain-text file that looks like a short chat log. A few lines are enough; you don’t need a novel. Example format:
—————————————————————————————————
From: alice@example.com
To: bob@example.com
Subject: Quick check-in
Date: 2026-02-03 09:12 UTC
Hey, did you get the new key? I’m attaching the fragment below.
—————————————————————————————————
Add a line that says you’re attaching an OTP fragment (we’ll generate that next). Vary the tone — some messages can be informal (“Did you see the news?”), others more technical (“Here’s the DH parameters”). Mixing styles makes the logs feel authentic.
2. Generate a tiny OTP fragment
On your Linux workstation run:
ddif=/dev/urandombs=24count=1of=frag_01.binstatus=none
This creates a 24-byte random file. Rename it to something that looks like an attachment, e.g., key_fragment_01.bin. You can repeat the command to make as many fragments as you need for the puzzle network.
3. Bundle the chat log and fragment
Put the chat log (let’s call it chat_01.txt) and the fragment into a temporary folder:
mkdirtemp_bundlecpchat_01.txt temp_bundle/cpfrag_01.bin temp_bundle/
Create a tarball:
tarczf bundle_01.tar.gz -C temp_bundle.
Now you have a single compressed file that contains both the conversation and the hidden OTP piece.
4. Encrypt the bundle with the weekly RSA 2048 key
Assuming you already exported the public part of the weekly key to weekly_pub.asc, import it temporarily:
gpg --import weekly_pub.ascEncrypt the tarball:
gpg --armor --encrypt --recipient"PixelatedDwarf Weekly 2026"-o bundle_01.asc bundle_01.tar.gz
The result, bundle_01.asc, is a PGP-armored file that looks like any other encrypted attachment. To a casual observer it’s just a block of gibberish, but anyone with the private weekly key can peel it open and recover the chat log and OTP fragment.
5. Clean up
Remove the temporary folder and the unencrypted tarball so only the encrypted .asc remains:
rm-rf temp_bundle bundle_01.tar.gz
You can now upload bundle_01.asc to the honeypot/ directory on your server.
6. What else to include for realism
- Timestamps that span a few hours or days, not all at once.
- Different senders (Bob, Carol, Ted, Alice) so the logs feel like a group chat.
- Occasional “noise” – a line about coffee, a joke, or a typo.
- References to a “key” – phrases like “see attachment” or “here’s the one-time pad” reinforce the bait.
Step Five – Create the self-destructing OTP bundles
The self-destructing part of the honeypot is basically a “time-stamp” wrapper around each encrypted bundle. After you finish creating a daily or weekly archive (the PGP-armored .asc file), you add a clear expiration note — something like “Expires 02/28/2026”—inside the file name or a tiny README that sits next to it. Then you set up a tiny cron script on your Pop! OS workstation that runs once a day, checks whether the current date has passed the expiration, and if so moves the old file out of the public honeypot/ folder and replaces it with the next month’s archive. On the server side you add a simple nginx (or Apache) rule that returns an HTTP 410 Gone response for any request to the expired path, so anyone trying to download it sees a clean “file removed” message. This creates a genuine sense of urgency: analysts have to act before the deadline, and if they miss it they’re forced to start over with a fresh puzzle.
All the shell commands for generating the expiration-aware filenames, the cron entry, and the web-server configuration snippets will be bundled in the master ZIP file that accompanies the article, so you can unzip, inspect, and run them on your own machine without having to type anything manually.
Step Six – Design the snowflake-style puzzle network
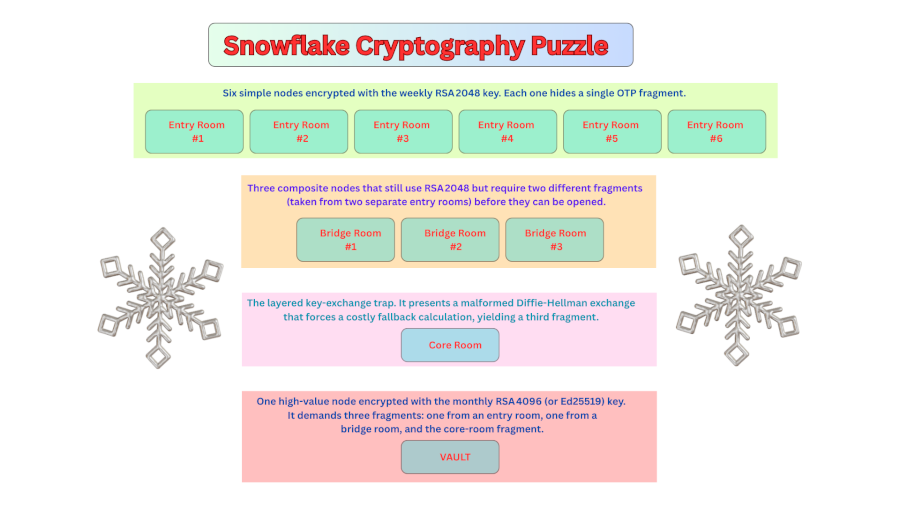
The overall shape
The puzzle is a small graph with four layers.
- Entry rooms – Six simple nodes encrypted with the weekly RSA 2048 key. Each one hides a single OTP fragment.
- Bridge rooms – Three composite nodes that still use RSA 2048 but require two different fragments (taken from two separate entry rooms) before they can be opened.
- Core room – The layered key-exchange trap (Room 3A). It presents a malformed Diffie-Hellman exchange that forces a costly fallback calculation, yielding a third fragment.
- Vault room – One high-value node encrypted with the monthly RSA 4096 (or Ed25519) key. It demands three fragments: one from an entry room, one from a bridge room, and the core-room fragment.
The non-linear layout forces anyone who discovers the honeypot to wander back and forth, combine keys from different branches, and ultimately expend a lot of CPU time before reaching the prized vault.